
Chiseiko Essential Swatches
Installation
This chapter walks you through installing the Free plugin and, if you have it, the Pro add-on. You only need to do this once.
Installing the Free Plugin
The Free plugin must always be installed and active. The Pro add-on cannot work without it.
Step 1 — Upload the plugin
- Log in to your WordPress admin dashboard (usually
yoursite.com/wp-admin). - In the left-hand menu, go to Plugins → Add New Plugin.
- Click the Upload Plugin button near the top of the page.
- Click Choose File and select the file called
chiseiko-essential-swatches.zipthat you downloaded. - Click Install Now.
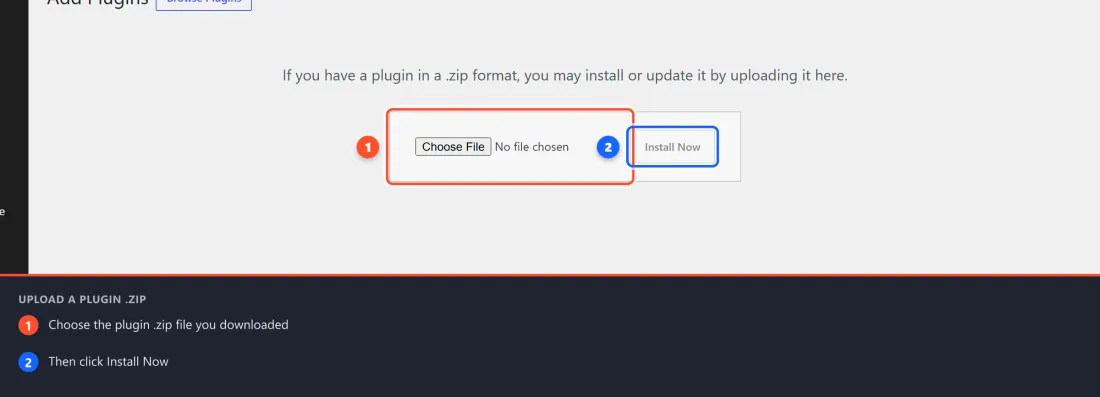
WordPress will upload and unpack the plugin. When it is done, you will see a success message.
Step 2 — Activate the plugin
After installation, click Activate Plugin.
You should now see "Chiseiko Essential Swatches" listed in your Plugins screen with a green "Active" badge.
Tip: If you see a red notice saying WooCommerce is missing or needs to be updated, make sure WooCommerce is installed and active first, then refresh the page.
Installing the Pro Add-On
You must install and activate the Free plugin first. The Pro add-on will not load if the Free plugin is missing.
Step 1 — Upload the Pro plugin
- Go to Plugins → Add New Plugin.
- Click Upload Plugin.
- Upload the file called
chiseiko-essential-swatches-pro.zip. - Click Install Now.
Step 2 — Activate the Pro plugin
Click Activate Plugin.
You should now see both plugins listed and active in your Plugins screen:
- Chiseiko Essential Swatches
- Chiseiko Essential Swatches Pro
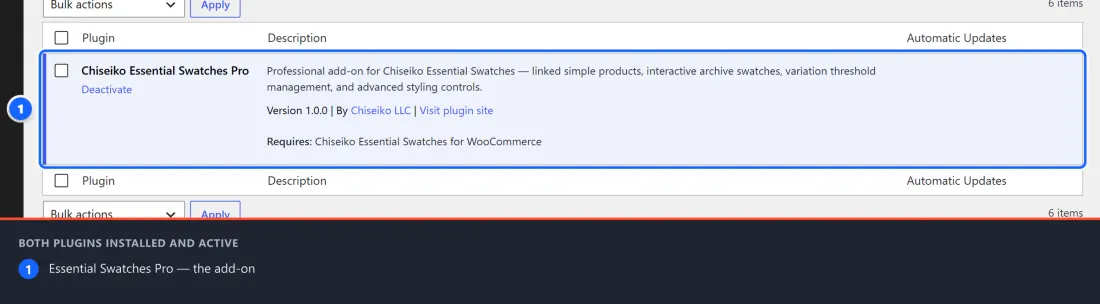
Step 3 — Confirm the Pro menu appears
In the WordPress left-hand menu, go to WooCommerce. You should see a new item called Chiseiko Essential Swatches Pro in the submenu.
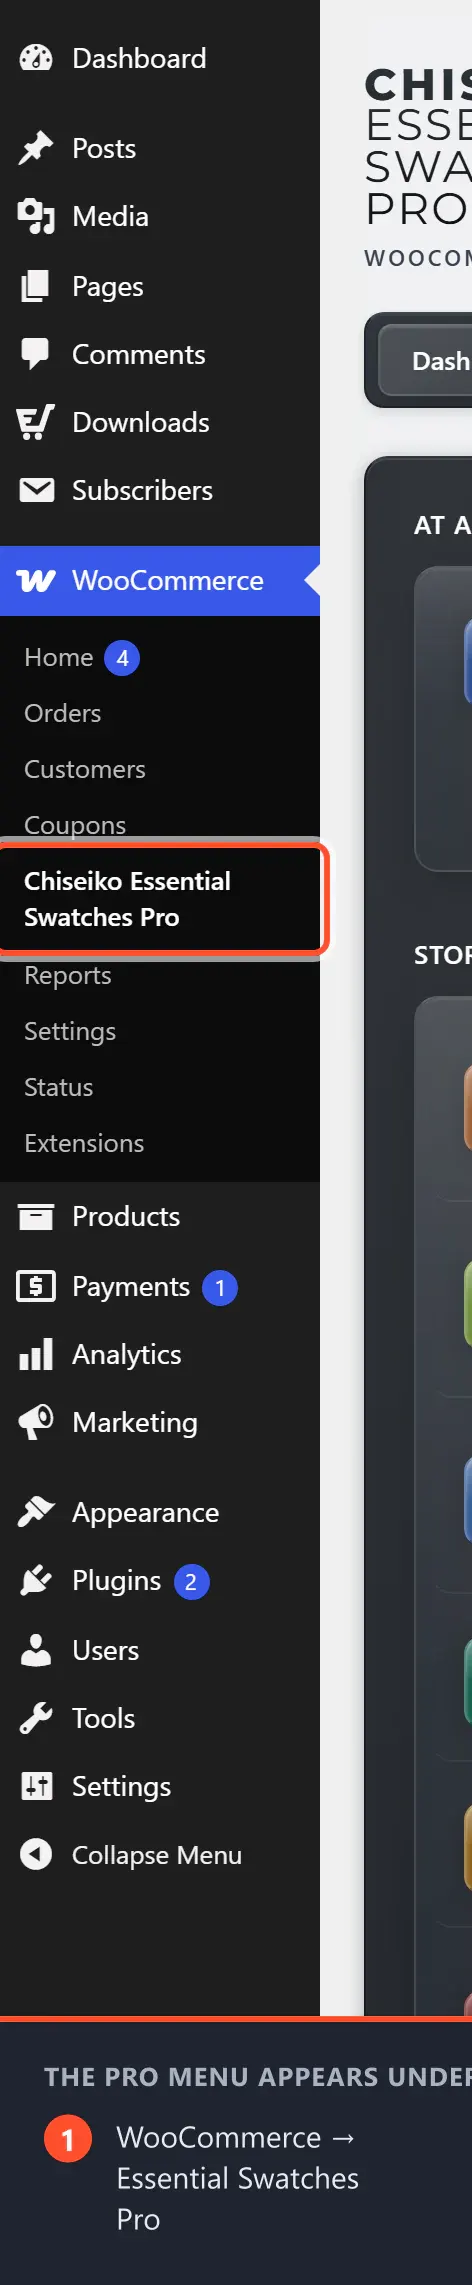
If you do not see it, try refreshing the page or deactivating and reactivating both plugins.
What Gets Installed
When you activate the Free plugin, no new top-level menu is added — most configuration happens directly on your product attribute pages (covered in the next chapter). The Free plugin does add an Chiseiko Essential Swatches Settings tab under WooCommerce → Settings, where you can adjust swatch layout and turn on the optional interactive archive swatches (see Chapter 7).
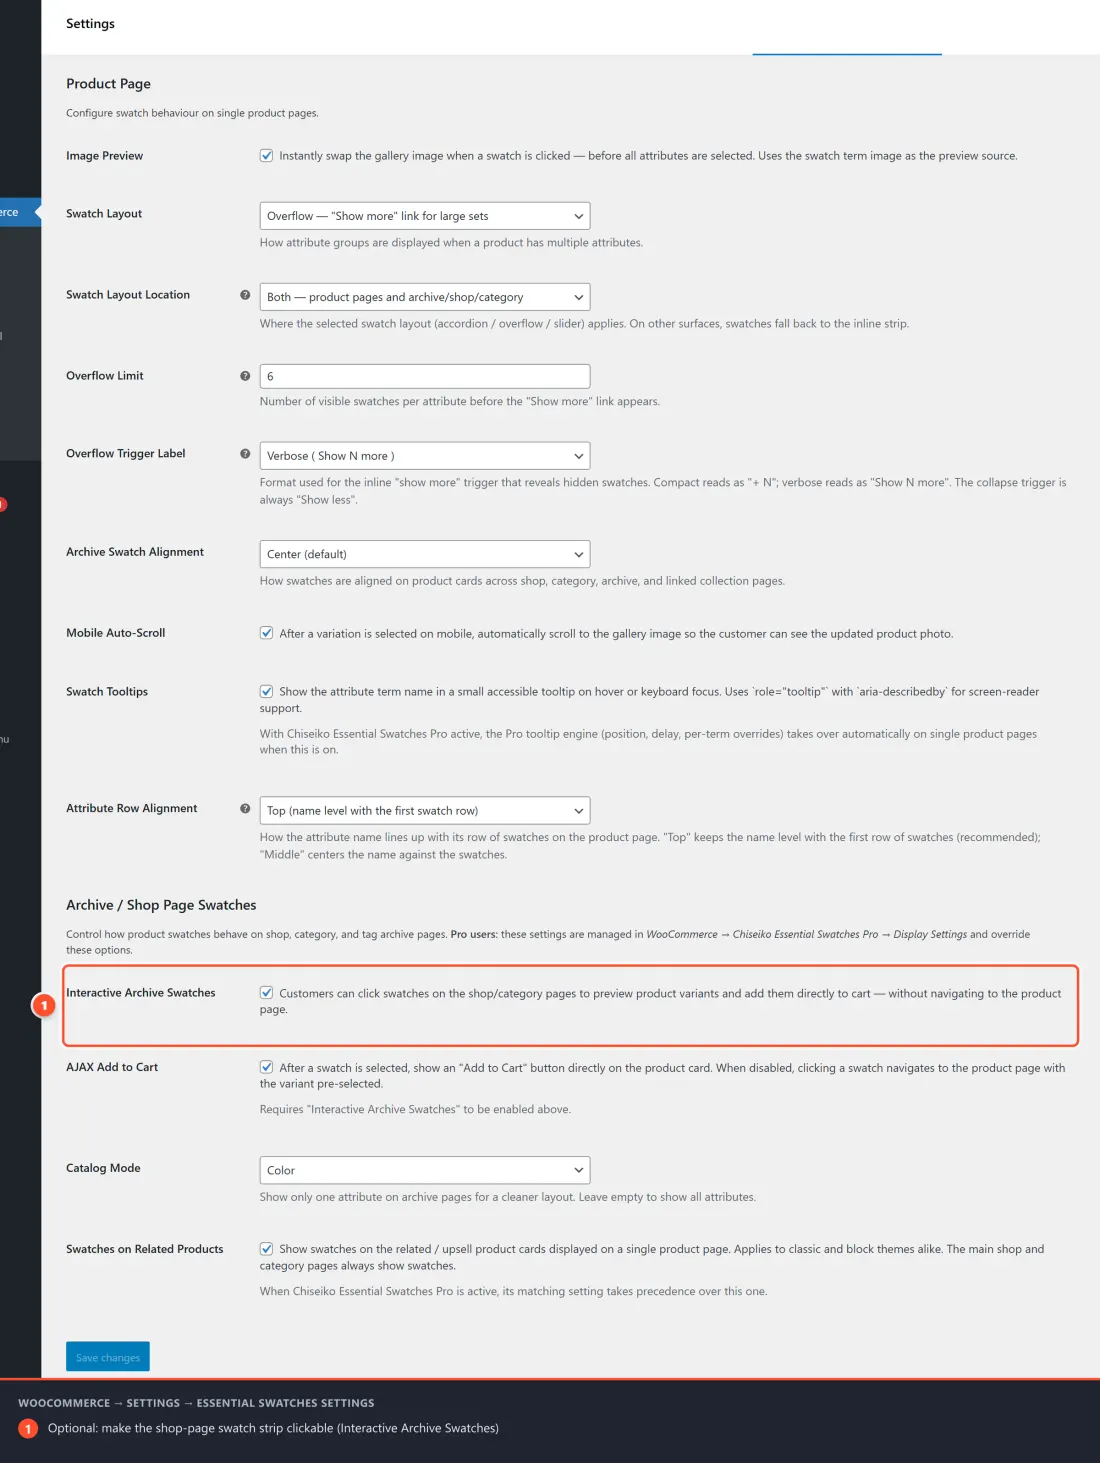
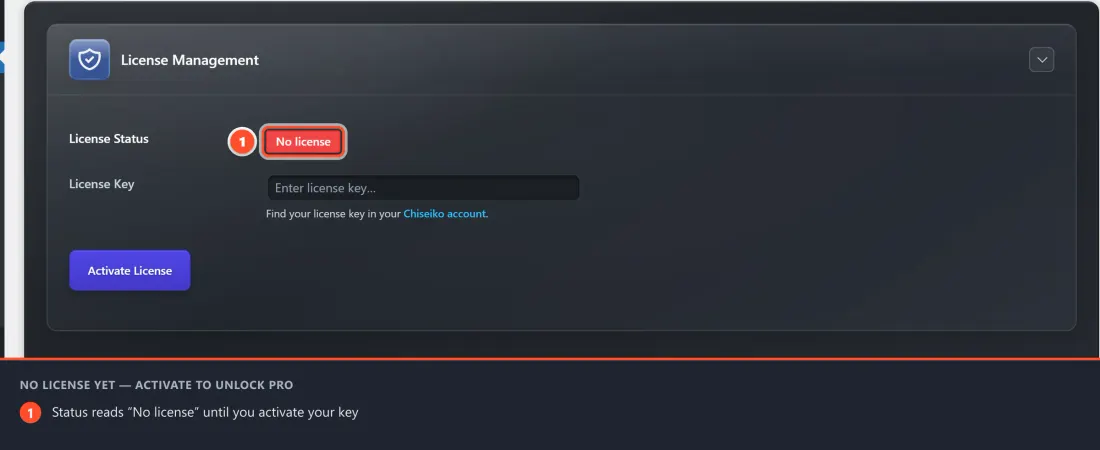
When you activate the Pro add-on, a new settings page appears at WooCommerce → Chiseiko Essential Swatches Pro. This is where you manage your license and enable/disable the Pro modules. Until you enter a key, the License tab shows No license — enter and activate your key to unlock the Pro modules (see Chapter 5).
Updating the Plugins
When a new version is available:
- Go to Dashboard → Updates in your admin panel.
- Check the box next to Chiseiko Essential Swatches (and/or the Pro add-on).
- Click Update Plugins.
Your settings and swatch configurations are never deleted during an update.
Uninstalling
If you ever need to remove the plugins:
- Go to Plugins.
- Click Deactivate under the plugin name.
- After deactivating, click Delete.
Note: Deleting the plugin removes the plugin files but will not delete the swatch data you have already configured on your attributes — that data is stored in your database and will remain for if you ever reinstall.